
Digitizing for Embroidery: From Artwork to Machine-Ready Files
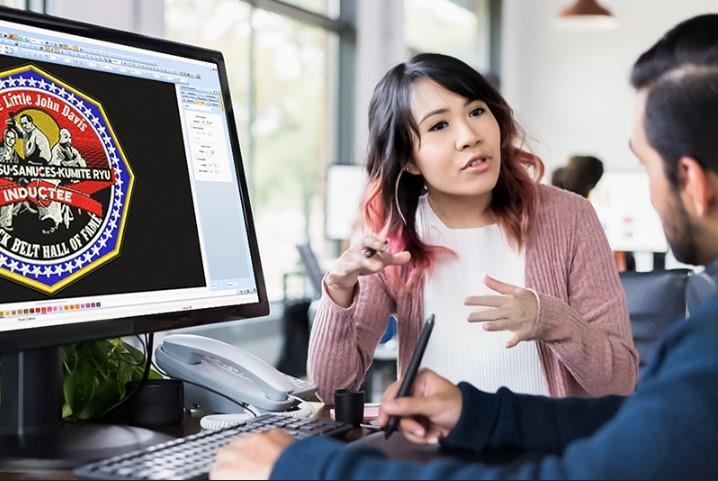
Digitizing For Embroidery is the backbone of every clean, professional, and high-quality stitched design you see on caps, shirts, jackets, and patches. No matter how great your artwork looks on screen, an embroidery machine can’t read JPGs or PNGs; it needs a stitch-based file created through proper digitizing. This process transforms artwork into machine-ready embroidery files that stitch smoothly, accurately, and without errors.
In this in-depth guide, we’ll walk you through the complete journey of embroidery digitizing from raw artwork to a flawless stitch file while explaining why professional digitizing makes all the difference.
What Is Digitizing for Embroidery?
Digitizing for embroidery is the process of converting artwork into a digital embroidery file that tells the machine exactly how to stitch a design. Instead of pixels or vectors, embroidery machines follow stitch commands such as direction, stitch type, density, and sequence.
This means digitizing isn’t just file conversion it’s a technical and creative skill that directly impacts stitch quality.
Why Digitizing for Embroidery Is So Important
Many beginners underestimate the importance of proper digitizing. Poor digitizing leads to thread breaks, puckering, misalignment, and messy designs.
Benefits of Professional Digitizing
- Smooth, even stitching
- Clean edges and sharp details
- Correct stitch density
- Reduced thread breaks
- Faster machine runtime
Good digitizing saves time, material, and frustration.
Understanding Artwork Before Digitizing
Every embroidery project starts with artwork. The quality and type of artwork play a huge role in the final result.
Common Artwork Formats
- JPG/PNG (raster images)
- AI/EPS/SVG (vector files)
- PDF files
Vector artwork is ideal, but experienced digitizers can also work with raster images by cleaning and simplifying them.
Preparing Artwork for Embroidery Digitizing
Not all designs are embroidery-friendly right out of the box.
Artwork Adjustments Needed
- Simplifying complex details
- Thickening thin lines
- Removing unnecessary gradients
- Adjusting text size
Embroidery works best with bold, clean shapes rather than tiny details.
Choosing the Right Stitch Types
Stitch selection is a critical part of digitizing for embroidery.
Common Stitch Types
- Satin Stitch: Best for text and borders
- Fill Stitch: Ideal for large areas
- Running Stitch: Used for outlines and fine details
Using the wrong stitch type can ruin an otherwise great design.
Stitch Direction and Flow
Stitch direction affects both the look and durability of embroidery.
Why Stitch Direction Matters
- Enhances texture and depth
- Prevents fabric pulling
- Improves overall design clarity
Professional digitizers plan stitch flow carefully to ensure smooth results.
Underlay Stitches: The Hidden Foundation
Underlay stitches act as a base layer beneath the visible stitches.
Benefits of Underlay
- Stabilizes fabric
- Prevents puckering
- Improves stitch coverage
Skipping underlay is one of the biggest mistakes in poor-quality digitizing.
Managing Stitch Density Correctly
Stitch density controls how tightly stitches are placed.
Too Dense
- Causes thread breaks
- Makes designs stiff
- Damages fabric
Too Light
- Shows fabric underneath
- Looks uneven
Balanced density is essential for professional results.
Color Sequencing and Thread Changes
Efficient digitizing minimizes unnecessary thread changes.
Why Color Order Matters
- Reduces machine downtime
- Prevents misalignment
- Speeds up production
Smart sequencing improves both efficiency and stitch quality.
Sizing and Scaling Embroidery Designs
Embroidery doesn’t scale like print designs.
Important Sizing Considerations
- Small designs need simplified details
- Text must remain readable
- Stitch density must be adjusted when resizing
Resizing without re-digitizing often leads to poor results.
Choosing the Right Embroidery File Format
Different machines require different file formats.
Common Embroidery File Types
- DST (Tajima)
- PES (Brother/Babylock)
- JEF (Janome)
- EXP (Melco/Bernina)
- VP3 (Pfaff)
A machine-ready file must match your embroidery machine exactly.
Testing the Digitized File
Before production, a test stitch-out is essential.
Why Testing Matters
- Reveals stitch errors
- Shows real fabric behavior
- Ensures proper alignment
Skipping test runs often leads to wasted materials.
Common Digitizing Mistakes to Avoid
Even small errors can ruin embroidery.
Mistakes to Watch Out For
- Ignoring fabric type
- Overcomplicating designs
- Poor stitch sequencing
- Incorrect pull compensation
Experienced digitizers know how to avoid these pitfalls.
Fabric Type and Its Impact on Digitizing
Different fabrics behave differently under stitching.
Fabric-Specific Considerations
- Stretch fabrics need extra stabilization
- Thick fabrics require adjusted density
- Delicate fabrics need lighter stitches
Digitizing must always match the fabric being embroidered.
Digitizing for Different Products
Each embroidery product has unique requirements.
Product-Specific Digitizing
- Caps: Center-out stitching and proper angles
- Jackets: Adjusted density for thick material
- Patches: Strong borders and edge reinforcement
- Towels: High-loft underlay to prevent sinking
One-size-fits-all digitizing doesn’t work.
Manual Digitizing vs Auto-Digitizing
Auto-digitizing software may seem tempting, but it has limitations.
Auto-Digitizing Drawbacks
- Poor stitch flow
- Inaccurate density
- Messy details
Manual digitizing by skilled professionals delivers far superior results.
Why Professional Digitizing Saves Money
While DIY digitizing might look cheaper upfront, mistakes cost more in the long run.
Professional Digitizing Advantages
- Fewer errors
- Less thread waste
- Reduced machine downtime
- Consistent quality
Quality digitizing pays for itself over time.
How Long Does Digitizing Take?
Turnaround time depends on design complexity.
Typical Timelines
- Simple logos: 2–6 hours
- Complex designs: 12–24 hours
Rush services are often available when needed.
Who Needs Digitizing for Embroidery?
Digitizing is essential for:
- Apparel brands
- Embroidery shops
- Promotional companies
- Sports teams
- Small businesses
- Hobbyists
Anyone using embroidery machines needs proper digitizing.
Final Thoughts
Digitizing for embroidery is where creativity meets precision. From preparing artwork and choosing stitch types to balancing density and testing files, every step matters. A well-digitized design ensures smooth stitching, professional results, and long-lasting embroidery that truly represents your brand or artwork.
For reliable, high-quality embroidery digitizing that turns artwork into flawless machine-ready files, trust the expertise of Digitizing Buddy to bring your designs to life with precision and care.